Add Row
Add Element
cropper
update

J. Ororo Agency

cropper
update
Add Element


Home Care Insider: Smarter Maintenance. Better Homes

Expert Advice, DIY Fixes, and Pro Tips to Keep Your Home in
Top Shape.

Add Row
Add Element
March 06.2025
3 Minutes Read

14 Ways to Eliminate Garbage Can Odors: Simple, Effective Tips

Remove trash from bin with yellow gloves to eliminate garbage can odors

The Stink in Your Kitchen: Why Garbage Can Odors Matter

Walking by a smelly garbage bin can be more than just unpleasant; it can impact your home environment in ways you might not realize. A dirty bin not only emits an awful smell but can also attract pests and bacteria, compromising the cleanliness of your home. Home expert Ryan Knoll of Tidy Casa emphasizes this connection, highlighting the importance of maintaining odor-free trash cans to preserve a healthy living space.

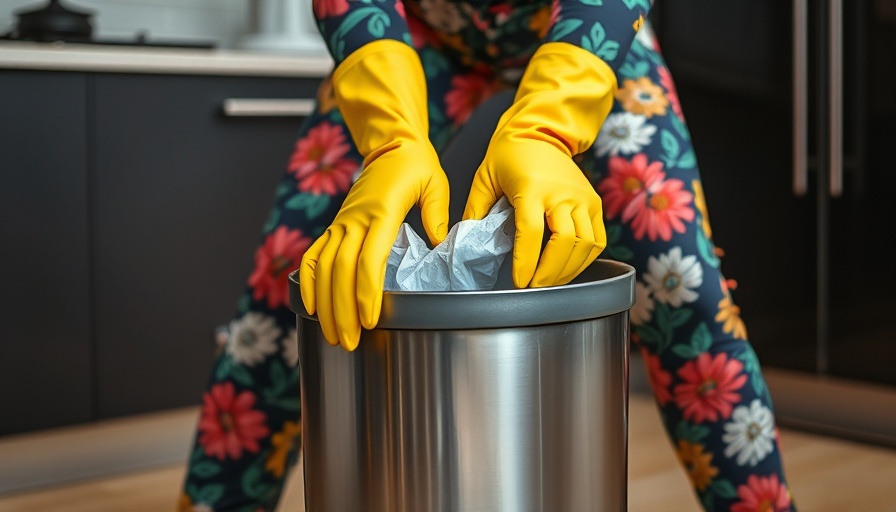
Routine Cleaning: The First Step to Odor Control

One of the simplest yet most effective methods for combating garbage can odors is regular cleaning. Vanessa Bossart from GreenTerra Cleaning Service notes that grime can accumulate quickly, especially in the event of leaks. Set a reminder to clean your trash can every week or two, using soapy water and a bristle brush, letting it sun dry afterward. This proactive approach not only eliminates odors but prevents them from returning.

Disinfection Isn't Optional

A thorough cleaning isn’t complete without disinfection. Delah Gomasi, Managing Director at MaidForYou, stresses that common household cleaners might not cut it. To effectively combat bacteria, spray disinfectant generously, allowing it to air-dry on the surface. This crucial step ensures that the trash can is not only clean but also sanitary.

Baking Soda: Your Kitchen Hero

Baking soda is another valuable tool in your odor-fighting arsenal. Known for its ability to neutralize odors, it can be sprinkled at the bottom of the can before inserting a new bag. Cameron Anderson, founder of All Kind Gas & Plumbing, recommends mixing a few drops of essential oil with baking soda for an added aromatic boost.

Charcoal to the Rescue

Activated charcoal serves as a powerhouse of odor absorption. Place a pouch or some briquettes in your bin to trap odors on a molecular level. Unlike baking soda, which requires occasional replacement, activated charcoal needs to be refreshed every few weeks, making it a low-maintenance option.

Natural Solutions: Coffee Grounds and Citrus Peels

For those who prefer natural solutions, coffee grounds are ideal at combating smells and leaving a pleasant aroma. Ensure they are dried beforehand to prevent mold. Similarly, citrus peels, when placed at the bottom of the bin, can help neutralize odors while providing a fresh scent.

Fun with Dryer Sheets and Cat Litter

Exploit the fresh fragrance of dryer sheets by tucking them into the bottom of your trash can. They not only mask odors but also absorb messes. Additionally, for cat owners, repurposing some cat litter at the base of your trash can can significantly reduce moisture and odors.

Taking It a Step Further: Essential Oils and Odor Eliminators

Consider creating a homemade deodorizing spray using essential oils like lemon, lavender, or peppermint. Mix these with water and vinegar for a potent solution. Some may even opt for commercially available odor eliminator pods that attach to the garbage can, offering an effortless and continual solution to unpleasant smells.

Consistency is Key

Ultimately, managing trash can odors is about consistency. Regularly removing trash, cleaning the bin, and utilizing odor-fighting hacks can dramatically enhance your kitchen aroma. Remember, maintaining a fresh-smelling home begins with keeping the source of odors in check.

Conclusion: Freshen Up Your Home Today

Taking these steps not only keeps your kitchen smelling pleasant but also promotes a healthier living environment. Ready to say goodbye to unsightly smells? Implement these effective strategies today, and turn your garbage can into a model of cleanliness!

DIY Repairs

Write A Comment

*
*
Related Posts All Posts

Transform Your Flooring: DIY Carpet Squares in Just Three Hours!

Transform Your Space: A DIY Carpet Square InstallationIn the age of home improvement documentaries and social media tutorials, the possibilities for transforming your living space seem endless. One of the most innovative yet simple projects is updating your flooring with carpet squares. This DIY-friendly approach not only revamps your home's aesthetics but also proves to be budget-conscious, perfect for homeowners looking to maintain or increase their property value.In The GENIUS new way she updates her flooring in 3 hours!, the discussion dives into innovative flooring updates, exploring key insights that sparked deeper analysis on our end. A Warm Embrace: Why Choose Carpet Squares?Carpet squares are more than just a fashionable trend; they provide exceptional functionality. Adhering directly to a concrete surface, these squares add cushioning and warmth that colder floors often lack. Homeowners love how forgiving they are, easily masking imperfections in your existing flooring. Plus, they avoid the mess and time investment typically associated with traditional carpet installations.The Steps to a Seamless LookLet’s dive into how to execute this transformation. Start by cleaning your concrete surface thoroughly; you want to ensure the best adhesion for your carpet squares. Using double-sided carpet tape, lay your first row of squares from a corner. The importance of clean lines and snug fits cannot be understated. Misalignment can lead to an unprofessional-looking finish, so take your time as you press each square into place. Remember: the tape is your best friend! It works behind-the-scenes, ensuring each square sticks without a hitch.Overcoming Common ChallengesWhat if you encounter obstacles, like a post in the middle of your floor? Fear not! Simply measure the required cut, flip the square upside down, and trim accordingly. While achieving perfection isn't necessary, a little precision will go a long way in providing a polished look. Trimmed baseboards can ingeniously hide any minor imperfections left at the edges.Budget-Friendly Solutions That Inspire CreativityEvery homeowner knows that renovation projects can strain finances. Yet, this DIY flooring project breathes life into your space without breaking the bank. Beyond carpet squares, consider alternatives like a torn paper technique, which involves applying adhesive with layers of paper and a final polyurethane coat, resulting in a unique and stylish finish. These cost-effective alternatives are excellent for creative homeowners eager to customize their homes.Maintain Your Investment: The Practical Benefits of Carpet SquaresOnce your new floor is down, maintenance remains straightforward. A simple vacuum suffices for upkeep, and if a square becomes stained, it can effortlessly be replaced without the hassle of a full reinstallation. The bottom line? Carpet squares not only enhance a room's ambiance but also provide practical benefits in maintenance—perfect for families with busy lives!Final Thoughts: Your Home, Your ComfortIn less than three hours, this DIY project can transform a cold, concrete floor into a warm, inviting haven. Home improvement doesn't have to be overwhelming; the right materials and techniques can empower any homeowner. So why not tackle this project for yourself? Dive into DIY with confidence and see your home flourish!Ready to start your transformation? Explore detailed step-by-step instructions, material lists, and more at Hometalk.com. Get inspired and take the leap into turning your house into the home you've always desired!

Transform Your Home with Thrifted Decor Ideas and DIY Projects

Revamp Your Living Space: Affordable DIY Decor IdeasHomeowners understand that creating a personal, inviting atmosphere can sometimes require more than just furniture rearrangement. Instead, consider diving into the world of DIY decor to transform your space without breaking the bank. This article explores some engaging and budget-friendly techniques inspired by the popular DIY video titled "Buy 3 Dollar Store plates for this BRILLIANT living room idea!" These ideas range from creative uses of thrifted plates to making oversized bulletin boards that can become the focal point of a room.In ‘Buy 3 Dollar Store plates for this BRILLIANT living room idea!’, the video highlights creative transformations using thrifted items, allowing us to analyze inspiring DIY projects that can enhance your home decor. Thrifting for Transformations: Reimagine Your Plate DecorOne of the simplest ways to add personality to your living space is by utilizing thrifted items. For example, old plates, like those highlighted in the video, can be transformed dramatically with just a few materials, including a porcelain pen. By drawing coastal themes or simple designs, you can easily personalize plates to serve as art pieces above a coffee bar or kitchen shelves.The method is straightforward: after decorating, let your creations dry, and seal them in the oven to achieve durability. While these plates aren't food-safe, they can offer significant aesthetic value and spark conversation.Create an Engaging Bulletin Board: Functional and StylishAnother exciting project from the video showcases how to create an enormous bulletin board using foam board and fabric. This project serves a dual purpose: it provides you with a useful space for organization while simultaneously adding texture and color to a room. Whether in a mudroom or home office, it allows for easy display of family schedules, photos, and other important memos.To start, you'll need to choose a fabric that complements your existing decor. After wrapping the foam board and securing it in place with staples, Command strips can be used for easy mounting. This results in a beautiful yet practical solution for keeping your home coordinated and organized.Projector Technique for Stunning Wall ArtFor those looking to add a wow factor to their walls, the DIY projector method described in the video is a must-try. By projecting a design onto a surface and tracing it, you can create custom wall art that reflects your personal style. This method is particularly useful for large designs that might be difficult to replicate freehand.The process allows for creativity without the need to spend significant time on preparation. Instead of investing in expensive canvas artwork, you can demonstrate artistic flair using simple tools like your smartphone light and a cardboard box, enhancing your home’s aesthetic on a budget.Crafting Unique Frames for Gallery WallsUsing thrifted or old frames is another exciting approach to giving your space a fresh aesthetic. In the video, various decorative techniques were suggested for transforming these frames into statement pieces. By combining paint, fabric, and creative patterns, these frames can become art in their own right, elevating the significance of whatever they hold.Implementing DIY techniques into your decor vision allows you to create a gallery wall that is uniquely your own. Each frame becomes a personal story, contributing to the overall narrative of your home.Budget-Friendly Projects for Any Skill LevelWhat stands out in the video is that these DIY projects aren’t just for seasoned crafters; they are accessible to everyone. As a homeowner, embracing your creativity doesn’t mean you need to be an expert. With a little imagination and a willingness to try, you can craft beautiful home decor without hefty price tags.The sense of accomplishment that comes from completing these projects goes hand-in-hand with the benefits of personalized decor. Your living space's transformation can foster a sense of pride and connection to your home.Making an Impact: Philosophy of DIY Home DecorUltimately, these DIY approaches not only enhance aesthetics but also provide a deeper personal connection to your space. Homeowners often seek ways to express their style; undertaking these projects allows that expression. Instead of settling for mass-produced items, investing time into DIY decorations ensures that your home tells your story.In conclusion, if you’re looking to illuminate your decor path without overspending, consider becoming adept at these simple DIY techniques. You might just find that a few simple ideas can make a world of difference. Grab your supplies and embark on the journey of innovative home decor transformation today.Don’t let those thrift store finds sit unused! Transform them with the creatively detailed methods highlighted in our discussion of the captivating video. Whether it's decorative plates, a large bulletin board, or innovative wall art, there’s a world of opportunity waiting for you to explore!

Discover Innovative Uses for Walmart Storage Cubes in Your Home

Transform Your Space with Walmart Storage CubesAre you looking for a versatile solution to manage clutter and enhance your home aesthetics? Walmart’s storage cubes have become a staple for homeowners, providing an affordable and stylish way to organize any room. In this article, we delve into the innovative ways to use these cubes in your bedroom and beyond, while offering DIY ideas that may inspire your next weekend project.In 'The BRILLIANT new way people are using Walmart storage cubes in their bedrooms', the discussion dives into creative DIY solutions, exploring key insights that sparked deeper analysis on our end. Why Storage Cubes Are a Game Changer in Home OrganizationThe trend of utilizing storage cubes in various living spaces is gaining momentum for a good reason. Not only do they serve practical purposes, but their design also makes them highly adaptable. What sets these cubes apart is their ease of assembly and customization. Each unit comes with all necessary parts, making it effortless for anyone to set up in no time.For those with creative flair, the cubes are just the beginning. From creating bespoke furniture such as benches to incorporating your design elements, the only limit is your imagination. The ability to personalize dimensions, colors, and finishes makes them highly desired among DIY enthusiasts and homeowners alike.Harness Your DIY Skills: Making the Most of Your Storage CubeWhen it comes to transforming a simple storage cube into a multi-functional piece, the first step is assembly. With just a few tools—like a brad nailer, some plywood, wood glue, and screws—you can elevate a basic storage solution into something outstanding. For example, covering the cube with wood slats stained in various colors can create an eye-catching top suitable for decoration or extra surface space.Taking it a step further, adding wheels to your storage cube can facilitate mobility, enabling you to rearrange your space effortlessly. Imagine a bench in your entryway that not only serves as seating but also holds your winter gear. With some creative fabric choices, it can seamlessly become part of your home decor!Incorporating Unique Elements: A Blend of Function and StyleHomeowners increasingly appreciate the aesthetic value of their storage solutions. Consider using fabric or paint from your favorite thrift store finds to create a unique piece that reflects your style. You might even repurpose fabric placemats into artistic elements that enhance your storage unit’s charm while making it more functional.Diverse materials can be used with the cubes, reflecting your personal touch in your home's atmosphere while addressing functional needs. Mixing textures and layers not only enhances visual appeal but also serves practical purposes—such as concealing items that belong to your children or pets.Expert Tips for Maximizing FunctionalityAs you embark on your DIY journey, keep these tips in mind for maximizing the functionality of your storage cubes:**Assess Your Needs**: Before diving into DIY, evaluate what items you need to store. This will inform the size and number of cubes to use.**Customize Colors and Styles**: When painting or staining, do so considering the colors and styles that align with your existing decor.**Make It Multifunctional**: Explore possibilities of adding benchtops or cushions to your storage cubicles to serve dual purposes, like extra seating.**Heavy Lifting**: When loading your cube, consider evenly distributing weight across multiple cubes rather than overloading a single one.**Accessorize Wisely**: Incorporating hardware upgrades such as unique knobs or casters can make your storage cubes even more useful and visually appealing.Embrace the Trend: Your Invitation to Start DIYingAs our lives become increasingly busy, the importance of practical and attractive storage solutions like Walmart storage cubes cannot be overstated. By engaging in DIY projects, not only do you create personalized pieces, but you also invest time in self-care and enhancing your living space. With each creation, you improve not only the organization of your environment but also contribute to your mental well-being by working on projects that help your home reflect your style.So, what are you waiting for? Grab a three-cube storage organizer from Walmart and get started on your next DIY project today. Click the link in the description and let your creativity flourish!

Add Row
Add Element
cropper
update
The Home Care Insider
cropper
update

The Home Care Insider blog is your go-to source for expert home maintenance tips, DIY fixes, and smart homeowner strategies. Whether you're looking to prevent costly repairs, upgrade your space, or get professional insights, we’ve got you covered with practical, easy-to-follow advice.

Add Element

COMPANY

  • Home
  • Categories
    • Home Maintenance
    • DIY Repairs
    • Home Safety & Protection
    • Expert Sights
    • Seasonal Home Care
    • Trending News
    • Landscaping
    • Home Decor
Add Element

530-962-0028

Elk Grove, California

Add Element
UPDATE
  • update
  • update
  • update
  • update
  • update
  • update
  • update
Add Element

© 2025 CompanyName All Rights Reserved. Address . Contact Us . Terms of Service . Privacy Policy

Terms of Service

Privacy Policy

Core Modal Title

Sorry, no results found

You Might Find These Articles Interesting

T
Please Check Your Email
We Will Be Following Up Shortly
*
*
*